
Happy Almost Halloween Peeps! We go straight back to the 80s with this fun and spooky Gremlin cake! Fitting in with my Halloween picnic, this creepy Gremlin pops out of the picnic basket hungry and looking for blood. Beware!
I'm not going to lie Dear Reader, this cake is a massive production and if you want it by Halloween you'll probably want to start it today. Having said that, it is quite a striking looking cake and I was quite happy with how it turned out. My last adventure with modelling chocolate didn't turn out so well (I don't want to talk about it haha!) so this was an improvement.
This makes an enormous cake as you can tell from the quantities in the recipe below. This is also a vegan cake too. Usually you use a chocolate mud cake as it is dense and solid but I thought I'd try this as a vegan cake and it seemed to work well. There is chocolate coconut ganache on this and a basket weave fondant. I wanted to have something bursting out of the picnic basket and at first I thought of octopus tentacles but then the idea of a Gremlin bursting out came to me! There are a lot of parts to this cake and the best way to approach it is by doing it over 3 days. This is not a cake to rush especially because things need to set.

"Do you think everyone has watched Gremlins?" I asked Mr NQN. I mean it would have been hilarious and sad if nobody knew what it was meant to be. Thankfully everyone has seen Gremlins or at least knew what it was meant to be.
Our Halloween party had a couple of 80's references from this Gremlins cake to Mr NQN's Karate Kid Shower costume. I was so impressed with how everyone had dressed up. For me, the food is the fun bit and maybe next year I'll be more organised and make my own costume but I usually just buy my costume.
Someone that always makes her own outfit is Queen Viv who turns up in a fantastic costume without fail. I think my favourite one was her Voodoo Priestess because the necklace was made with real boiled chicken bones that she had saved throughout the year from chicken dishes. either that or her Mummy outfit which everyone wanted to buy from her.

Her outfit was fantastic and she turned up as La Muerta or death. She was wearing black pants with big buttons on the side, heels, a big red hat with red pompoms around it and a rather fabulous bolero jacket with skull emblems on the front and back. Towards the end of the party I asked her about it and remarked how much I loved it.
She took off the jacket and handed it to me and said, "Wear it but then when you're done with it, leave it hanging up with a note that it wasn't worn for 3 days so someone else can wear it." You see every year outside her house she leaves her outfit with a note so the local kids can wear it and discover it. I can't even imagine how delightful that would be a discovery for a child!
So tell me Dear Reader, would you have recognised that it was a Gremlin? And can you make costumes and outfits?

Gremlins Cake
An Original Recipe by Lorraine Elliott
Preparation time: 6 hours plus drying time. Best started 3 days before.
Cooking time: 1 hour
- 9 cups/1188g/42ozs. plain or all purpose flour
- 6 cups/1266g/45ozs. brown sugar
- 2 1/4 cup cocoa/280g/9.9ozs. sifted (I used black cocoa)
- 55g/1.9ozs. bicarbonate of soda
- 1.5 teaspoons salt
- 6 cups/1.5litres/50flozs. water
- 2 1/4 cup/560ml/19flozs. mild flavoured vegetable oil (eg. canola oil)
- 250ml/1 cup/8.8flozs. white vinegar
- 2 tablespoons vanilla extract
- 225g/8ozs. dark chocolate, finely chopped
For Gremlin
- 200g/7ozs. modelling chocolate
- Moss green and white gum paste
- Red, pink, black and moss green colouring gel
- 1 teaspoon glucose or corn syrup
- 1 teaspoon vodka
- 2 teaspoons white royal icing
For Biscuit Top
- 85g/3ozs. butter, soft
- 140g/5ozs. caster sugar
- 1 egg
- 200g/7ozs. flour
- 30g/1oz. cocoa powder
For Ganache covering
- 1kg/2.2lbs. dark chocolate
- 500ml/16.9flozs. coconut cream
For Basket covering
- 1.25kgs/2.7ozs. brown fondant (new and fresh works best)
- Edible glue
For cake board
- 500g/1.1lbs white fondant
- Red edible paint and 1 teaspoon vodka to match picnic tablecloth

Step 1 - You will need 3 x 30X20cms/11.8x8inch rectangular baking tins. Grease and line these tins on the base and sides. I mixed this in three bowls because it wouldn't fit in one bowl and it made it easier to divide. Whisk the flour, sugar, cocoa powder, bicarb and salt together. Then whisk the water, oil, vinegar and vanilla together.

Step 2 - Pour the wet mixture into the dry mixture in 4 or so lots (do not add all at once or it will become lumpy). Then stir in the chocolate. Pour into the prepared tins and bake for 45 minutes or until the centre springs back when gently pressed. Cool completely. I bake the cake part 1 day before I start decorating it.


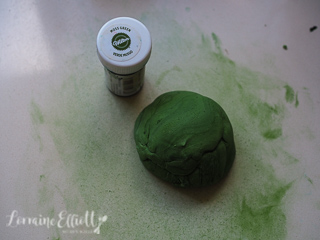
Step 3 - Make the gremlin figurine. Modelling chocolate sets hard so you will need to warm it. I do it in the microwave at 30% power at 20 second intervals. Just warm it until it is pliable and then shape the head. I basically found a picture of a gremlin that I liked and modelled it on that. A warning: this will take a while. Once you're happy with the shape you can refrigerate it to harden it and then get started on the gum paste covering.

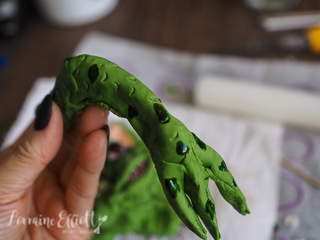
Step 4 - Roll out the gum paste til thin and then press onto the modelling chocolate (use a little water on a brush to adhere it). The eyebrows are a big feature and you can just keep building on it. I made scales on the face and arms using a metal straw. Allow to set completely overnight. Then draw on spots and colour the eyes red and black. Pipe royal icing teeth and lumps on the eyebrows of the Gremlin and pipe a fluffy crown on forehead.


Step 5 - Make the cookie topping (the top of the basket that will sit half open). Beat the butter and sugar on medium speed until pale for around 3 minutes. Add the egg and beat for a minute. Then on low speed add the flour and cocoa. Line one of the same 30x20cm/11.8x8inch tins and spread out the cookie dough and then cut a line down the centre for where the basket cover will open. Refrigerate for 30 minutes. Then bake for 20 minutes at 180C/350F or until set in the centre. Cool completely.

Step 6 - Make the chocolate ganache covering for the cake. Place the chocolate in a large heatproof bowl and heat the cream until almost boiling. Pour the cream on top of the chocolate and mix until smooth. You may have to microwave the chocolate mixture for 20 seconds or so to melt everything. Allow to cool and then thicken. I like to do this the night before. You want it to be spreadable but thick enough to hold so when you spread it on the side of the cake it doesn't drip down.
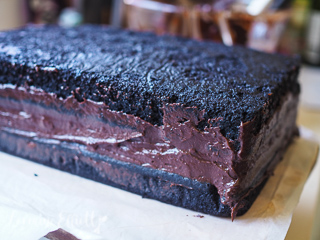
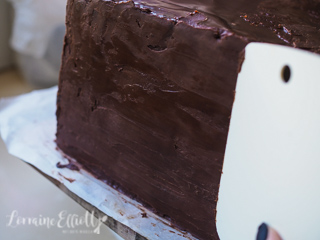
Step 7 - When the ganache is ready spread a little on the cake base to secure the cake to the base and place one cake layer. Ganache the cake on top to the edges and then add another cake layer repeating until you use all three cakes and the cake layers make for a solid rectangle. Refrigerate until set. Then ganache the sides and top of the cake with an angled spatula. Place in the fridge and allow to set. Then repeat making the ganache a bit thicker. Set in the fridge again. Then using a scraper dipped in a bit of water scrape down the ganache so that it is smooth. This takes time and patience and you'll have to add more ganache in spots.
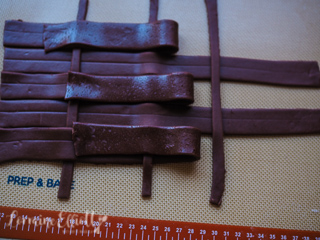
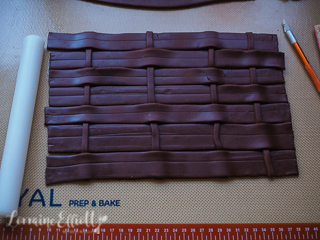
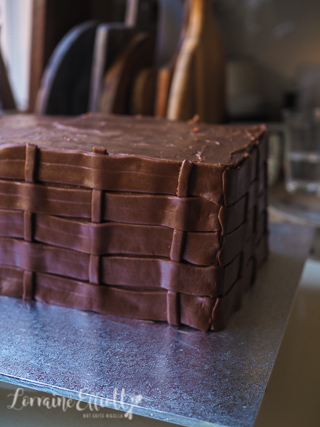
Step 8 - Then take the brown fondant and cut off a 500g/1.1lb block. Roll it out til thin on a silicon mat. Measure the dimensions of the cake (start on the smaller back or front as it will be easier) and measure out evenly sized strips (mine were an inch thick). Then taking a ruler and a cutter cut the strips. To make the basket weave cut some smaller pieces and then place these vertically under and over the strips.
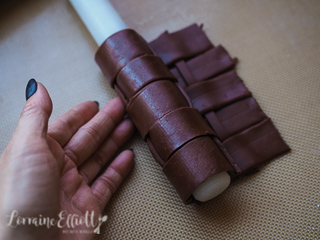
Step 9 - Brush the edible glue on the side of the basket and using a small rolling pin roll up the basket weave onto the rolling pin and then carry over to the cake and press it gently against the cake. Repeat on all sides. Then cut out thin strips and glue to the top rim of the cake.
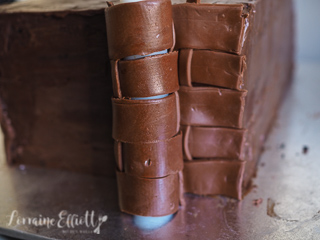
Step 10 - Place the biscuit top on the cake and then roll out more fondant basket weave and add on top. Cut out thin strips and then place around the top of the basket lid (I used two strips and twisted them gently). Then prop the basket open with skewers or dowels and place the gremlin figurine inside the basket along with arms. Place snake lollies around the Gremlin.

Step 11 - Roll out the white fondant in a size to cover the silver cake board. Mix the red colouring with vodka and paint the fondant to match the red and white checkered pattern to the tablecloth.
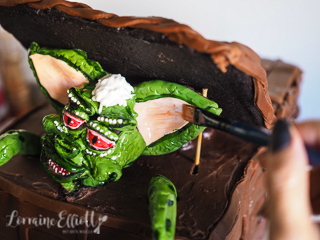
Step 12 - The final touch is making the gremlin glossy. Mix the glucose or corn syrup with the vodka well and then brush this onto the Gremlin head and arms.


Reader Comments
Loading comments...Add Comment